PSiGate (XML API) Configuration
Preparation
PSiGate does not allow auth transactions by default. In order to enable auth transactions, log into PSiGate control panel, go to Fraud Settings and set the 'allowed' menu for both PreAuth and PostAuth to 'YES'.
Configuration
- Select PSiGate in the Add New Gateway box.
- Click the Add button.
- Fill out the form that appears:
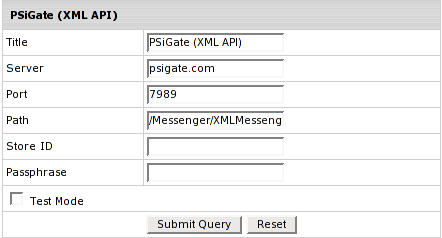
- Title: give a name to this PSiGate connection
- Server: the name of the PSiGate server
- Port: the port of the PSiGate server
- Path: the path to the server side handler file. This can be a script or a binary file that is launched with an http request.
- StoreID: your unique ID received from PSiGate
- Passphrase: PSiGate provides the Passphrase within the PSiGate Welcome Email
- Test Mode box: with Test Mode checked, all transactions appear to be processed as real transactions. The gateway accepts the transactions, but does not pass them on to the financial institutions. Accordingly, all transactions will be approved by the gateway when Test Mode is turned on.
- Click Submit Query
Test Note: Do not use real credit card numbers within the testing environment. When you are ready to go live, send an email to support@psigate.com to receive your production URL.
Send your test transactions to: https://dev.psigate.com:7989/Messenger/XMLMessenger. To process a transaction through the test account, pass the following:
StoreID: teststore
Passphrase: psigate1234
To review your test transactions, log into https://dev.psigate.com with the following account information:
CID : 1000001
User: teststore
pass: testpass