Mailbox Aliases
Mail aliases are alternative addresses to existing mailboxes on the same domain name. Messages sent to a mailbox alias arrive to the primary mailbox.
Creating Mail Aliases
- Click New E-mail on the Mail Manager page:
- Enter the mailbox alias name in the Email address field.
- Check the Catch All box to intercept messages sent to a non-existing account on the mail domain. If Catch All isn't enabled on any mail resource on this domain, such messages will bounce back to the sender with an error notification.
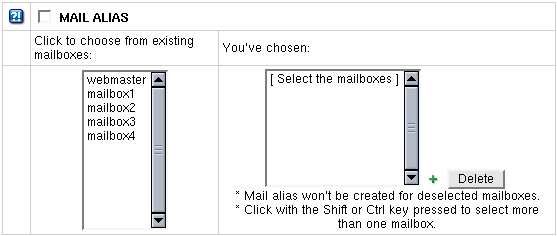
- Check the box next to MAIL ALIAS and click to choose from existing mailboxes list to assign the mailbox alias to it:

To assign a mailbox alias to more than one mailbox:
- Click mailbox names in the list with the Shift or Ctrl key pressed. Chosen mailbox(es) will appear in the list on the right.
Caution: the mailbox alias won't be created for the deselected mailboxes.
- Click Submit and agree with charges, if any.
You can change a mailbox alias or assign it to other mailbox(es) or do both at any moment after.
Unassigning Mailbox Alias from Mailbox
You can unassign a mailbox alias from the mailbox(es) it's currently assigned to.
- Click the mailbox alias e-mail address in the E-mail list on the Mail Manager page.
- Select the mailbox name it is currently assigned to in the left you have chosen: mailbox list.
- Press the Delete button next to the list.
To remove several mailboxes, select the mailboxes names in the list with the Shift or Ctrl key pressed and click Delete.
Removing Mailbox Aliases
To remove a mailbox alias preserving other services running on its e-mail address:
- Click the mailbox alias e-mail address in the E-mail list on the Mail Manager page.
- Uncheck the MAIL ALIAS box.
- Click Submit.
To remove a mailbox alias along with all mail services running it's e-mail address, click the Delete icon in the mailbox alias Properties column on the Mail Manager page:

To delete a Catch All mailbox alias, first switch Off Catch All.

