Master admin and resellers can edit e-mail notifications directly from Parallels H-Sphere control panel.
In previous versions, system emails were stored ONLY in system e-mail templates and could be edited only by master admin. Now system emails are stored in the Parallels H-Sphere database and can be modified in the admin CP for each of interface languages provided in Parallels H-Sphere.
To customize system emails in CP:
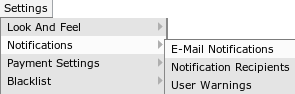
You will see the list of system e-mail notifications sent from the address entered as your company information. These notifications are grouped by categories:
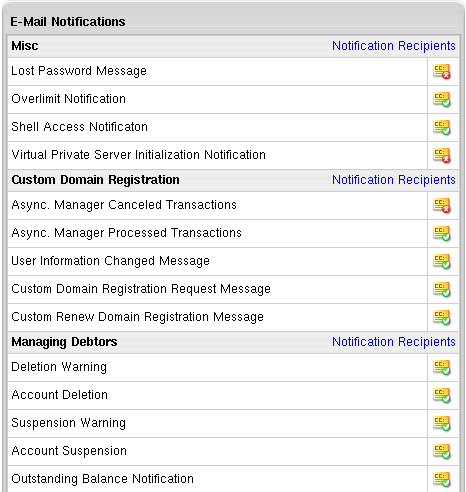
Checkboxes in the CC column to the left of the notification name indicate if sending BCCs is enabled or disabled. You cannot enable or disable sending BCCs directly in the list of notifications. To do this, you should open a notification for edition and check/uncheck this option at the bottom of the page that appears:
After that, the CC indicator will be changed in the list:
![]()
1) Preview: message preview as generated from the message template code:
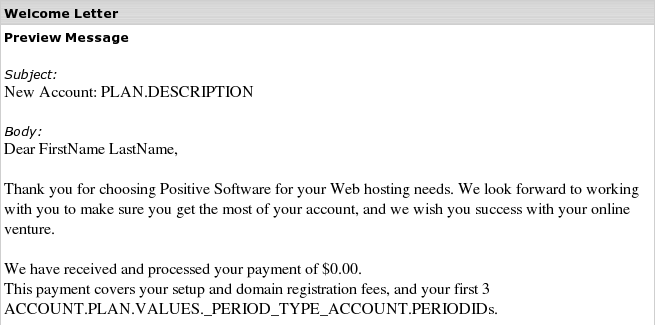
NOTE: Variable message fields such as user's first and last name or user login are replaced in Preview by the Parallels H-Sphere intuitively understandable "pseudo texts": FirstName, LastName, USER.LOGIN, and the like.
2) Edit Form: contains the subject title and the dynamically generated message body: 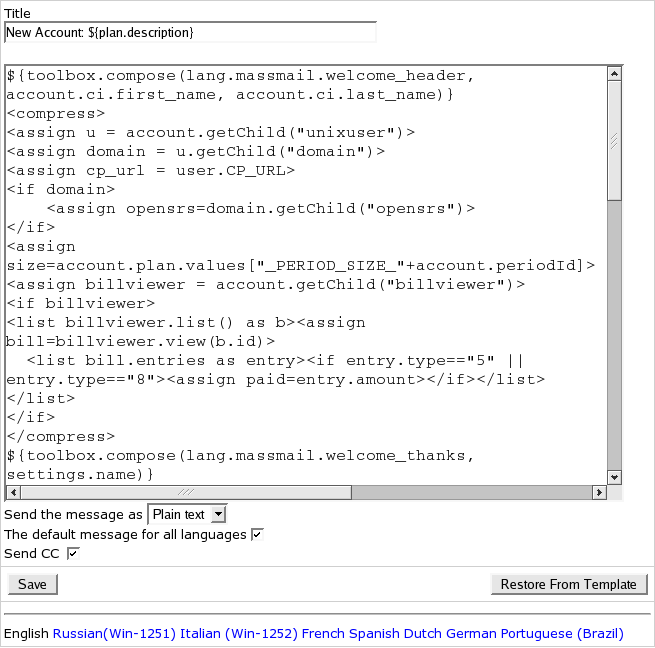
Send the message as: setting the message's content type, the format in which the message would be sent (in plain text or in HTML format).
Default message for all languages: this allows to make a custom email message default for those of the languages listed below that have this option ticked. If you do not want this message to be default for any of the languages, uncheck this option for that specific language.
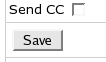
Send CC: check/uncheck this box to enable/disable sending copies (BCC:) of this particular message to e-mail addresses specified for this notification group in the Settings->Notification Recipients menu. This box is checked by default.
On the bottom of the form there is the language panel with all interface languages available in Parallels H-Sphere. Click to choose the language you wish to modify the message for.
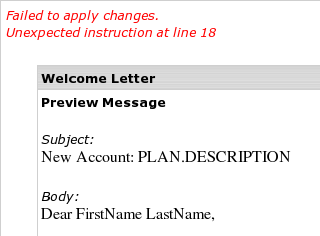
If you change the message code correctly, you will get the note that changes have been successfully saved (in the Parallels H-Sphere database), and you may see these changes in the Preview Message.
Otherwise, you will receive an error, and changes won't apply:
IMPORTANT:
1. System email messages are generated from Freemarker code. To correctly customize the code, you should be familiar with Freemarker commands and with Parallels H-Sphere advanced customization and resources.
2. There is no need to customize lang texts represented in the code as ${lang.text_name} and set in the bundle files in the /hsphere/local/home/cpanel/shiva//psoft/hsphere/lang/ default bundle directory or in custom bundles directory. Instead, you could set the text directly for each interface language here in the given form. For this, please make sure you uncheck the The default message for all languages box when editing the message for each language.
3. Changes applied to the system emails through the given form are stored in the system database and do not affect the .txt system email notification templates that are located in the /hsphere/local/home/cpanel/shiva/shiva-templates/common/mail. Moreover, you can restore the hardcoded system notification from the template by pressing the Restore From Template button at the bottom of the form.
We don't recommend customizing the default templates!