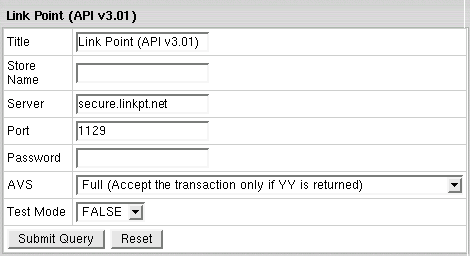
LinkPoint deprecated support for its old API. It may cause problems with signup and billing. To update API to v3.01, users should convert the certificate from PEM to P12 format (see below)
Make sure that the JLinkPointTxn.jar file is present in the /hsphere/local/home/cpanel/java_rt/ directory.
If it's not there:
 Restart Parallels H-Sphere.
When your linkpoint account is created you receive linkpoint welcome email which contains username, password and the certificate in the PEM format. You need to convert this certificate from PEM to P12 format. One way to do this is to run the following from a command prompt:
openssl pkcs12 -export -in YOURPEM.pem -inkey YOURPEM.pem -out YOURPEM.p12 -passout pass:YOURPASS -name "YOURNAME"
Where:
For example:
openssl pkcs12 -export -in cert.pem -inkey key.pem -out 1234567.p12 -passout pass:987654321 -name "LinkPoint"
PEM files example:
key.pem:
-----BEGIN RSA PRIVATE KEY-----
MIICXAIBAAKBgQC6gLgc6I+vcvoSkJHFZfzt/sJRy6rBwAtf8AUMguAqgCq8sz2H tIYHeng/71Z0uuPXUQY7veFUXDAXFvn4SLCresf5cHl9hxlqNITRY2MhTn92TLlV lmfzCZtBdhshncWydpQ6HcHOwRYUL8Ure1yw6iOlk7Q8ja6GstqiKbTWDQIDAQAB AoGAWv8C1dgCgzAuI3EL2APa7KQoW5BrfDzjXYUNNNgggejexeoOU3AZFP0EPu2f 2UR2dk/qIqv6jRaNwDZNsH6G8831PyTmUJoMZB+vuAeYFyEV6uWyzBFYJohubB2g V+fxq8wSalKKvmuyoUqr2TKexweumppUMCK+pruxfqeXuWECQQDtfpdiohLeTDaQ Q84yIHABD1H80r9KLfdc77R0f5Y5BL+Obh+p/5T&bdue7HBB673QzNB0CrHOJJQi xNiPYrJ/AkEAyQj5UX8dSVR8Xhcw/gVoqaB3WnyzmT4VSf8Y2tKlRETLNxIBTkAC 6BV9jkllOIIojFOl9kkj9OaMlF/fTm/ZcwJAPzihyAnpB/A13jWOoF1uM3oGk0zu yyptXPoaiaClNsyCycGbAEAfM32ax2ceqEL9JqY/H4TxTDUEkjTgiVr2tQJABrlW HXOy9xDsV/lOmj8V9P9P9P96HUoKTD9MBYWmIXJrmZvwjz101qzpV534Yi+xOpc/ Zd+HahmL+ip6vZTgIQJBANfO45PBiDZV71kHCmVDKnMUtR7FsJ7yKfZ2i/P8+23I k7GP9lp/fj7MkLLjdui8hdjkdoiZ5ylCYXgIvbE=
-----END RSA PRIVATE KEY-----
cert.pem
-----BEGIN CERTIFICATE-----
MIICZDCCAc2gAwIBAgIBADANBUndj8JJkoIUUTDClLIJNQswCQYDVQQIEwJOWTER kNNgTfDhBgFYGvNHGIUy8YHKjUY98ojHL9hkjH987YTIJXJlIGRldmVsb3BlcjEY MBYGA1UEAxMPTWF4aW0gS2FCMGDhhNSHYDJLLLSALLLCIvcNAQkBFhBta2FudHNA cHNvZnQubBSGDUuNHYiMMMUjhjhBKuuKLLLllHHUUJKHIjE1MzIzMVoweDELMAkG A1UECBMCTlkxETAPBgNVBAcTCE5ldyBZb3JrMRswGQYDVQQKExJILVNwaGVyZSBk ZXZlbG9wZXIxGDAW8jGFUUJ7B577b6655HGFHHHG5DSGHjEfMB0GCSqGSIb3DQEJ ARYQbWthbnRzQHBzb2Z0Lm5ld0UYGD7SH389SUNWFA8HXQEFAAOBjQAwgYkCgYEA uoC4HOiPr3L6EpFBVmX87f7CUcuqwcALX/AFDILgKoAqvLIIUDSUYID8732UJjjh SDIUDSTYR478745KWOS89SF7TL3I7RFHJDFPWP09866UJFO99SPWQQ2O9D99W4LJ ghdjuKKuhhkktgjyr3tcsOojpZO0PI2uhrLaoim01g0CAwEAATANBgkqhkiG9w0B AQQFAAOBgQBNm1GvV+jrioeiortu+etikugOIUOULLKOFLHJIOijglkr94mjosij Ommdsktuier/wUUYTUGDJKHGASDIUYODIYF/589739IDJLCKJI48kudow9JKHIOJ BUokxewLJHK/l1fJQbEr90SJK59DK409SL3Zn0r4sQVTTTQWDTdXjMVYA6A==
-----END CERTIFICATE-----
Important: To provide non US cardholders CC processing, disable AVS check-up in the merchant gateway configuration.