If your provider offers a Shared SSL certificate, you can use it instead of purchasing a certificate of your own. Unlike a regular SSL certificate, it costs less, doesn't require a dedicated IP, and belongs to an equally trusted Certificate Authority. The disadvantage of Shared SSL is that it can be used only with third level domains.
Shared SSL requires that your site runs on a Shared IP.
To secure your site with Shared SSL:
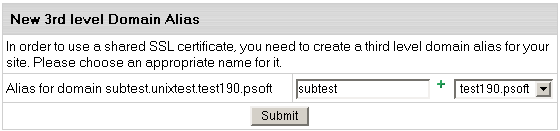
If you are using a second level domain (example.com), you will be asked to create a third level domain alias (for example, domainalias.example.com):
Now the site is available both at the non-secured second level domain name (e.g. http://example.com) and at the secured third level domain alias (e.g. https://example.victor.psoft). Note that Shared SSL certificates work only within one domain level, i.e. for user1.example.com and not for www.user1.example.com. In the example above, the certificate will not work for www.example.victor.psoft, and your visitors will get the warning: "The name on the security certificate does not match the name of the site".
Note: When designing your pages set any internal links to images or frames as <a href='https://user.domain.com/images/example.jpg'> or simply <a href='/images/example.jpg'>. If you use the <a href='http://...> link, your visitors will get the message: "The page contains both secure and non-secure items". This is not much of a problem in terms of security, since visitors may simply choose the "do not display non-secure items" option, but no graphics will be displayed.